How to install a wall-mounted IV drip stand at home? This question deserves more caution than a simple do-it-yourself checklist suggests. A wall-mounted stand supports a hanging infusion container, but it does not make home infusion safe by itself. The prescribed medication, access device, tubing, flow rate, and emergency plan require direction from a licensed healthcare professional. Never improvise with household hooks, unsecured anchors, or unapproved medical supplies.
The World Health Organization’s Global Report on Infection Prevention and Control reports that healthcare-associated infections affect about 7 in 100 patients in high-income countries and 15 in 100 patients in low- and middle-income countries. Its central message is practical: prevention depends on reliable systems, clean technique, and trained people. Dr. Tedros Adhanom Ghebreyesus has stated, “Health is a fundamental human right.” That principle includes safe care at home, not merely convenient care.
This guide will examine wall selection, load limits, stud or masonry anchoring, height, tubing clearance, and inspection. A solid wall can still hide damaged wiring or plumbing. A tidy setup can still create a trip hazard. That is the uncomfortable part. Before installation, ask the prescribing clinician or home-infusion nurse to approve the location and hardware. The setup should keep the bag visible, the line free from sharp edges, and children and pets away. If dizziness, swelling, pain, leakage, breathing difficulty, or fever occurs, stop and contact the clinical team or emergency services according to the care plan.
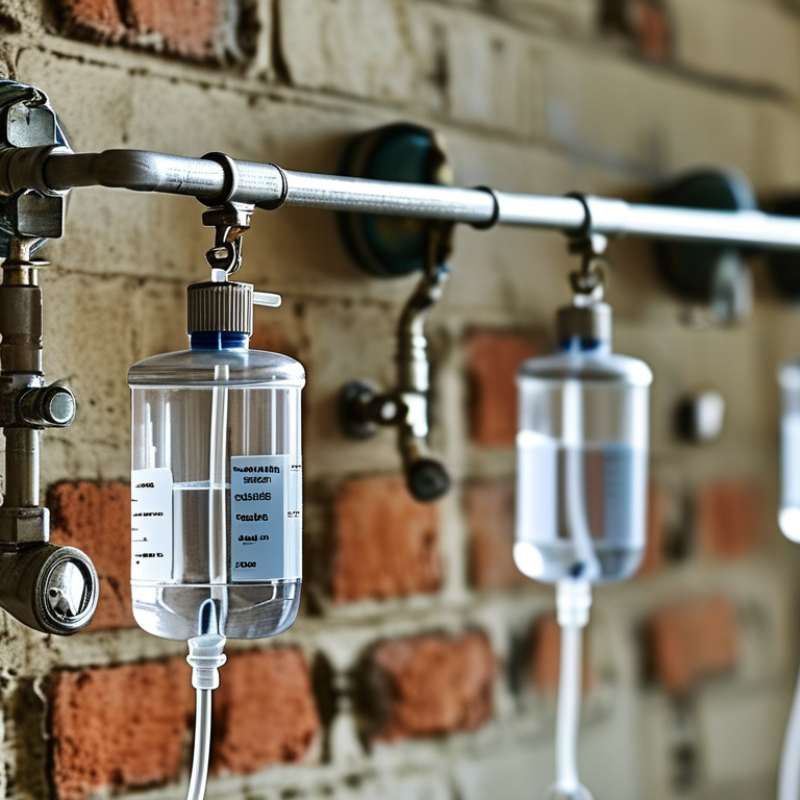
Purpose and Safety Considerations for a Home Wall-Mounted IV Stand
How to Install a Wall Mounted IV Stand at Home?
A wall-mounted IV stand provides a stable place to hang an infusion bag during prescribed home treatment. It can reduce clutter and keep tubing away from furniture. However, it is not a medical device that replaces professional supervision. A qualified nurse or clinician should confirm whether home infusion is appropriate. They should also determine the correct bag height, equipment position, and monitoring schedule.
Choose a solid wall area with clear access around the patient. Avoid loose plaster, damp spaces, heat sources, and locations near children or pets. The mounting surface must support the stand, bag, and connected tubing without movement. Use suitable wall hardware, then check that every screw is secure. Do not guess the wall type. That shortcut can fail.
Keep the tubing visible and away from walkways. Never allow it to pull on the catheter or rest near sharp edges. Check the stand before each use for cracks, bending, rust, or loose parts. The infusion bag should hang only as directed by a healthcare professional. Do not adjust flow rates, disconnect lines, or reuse supplies without clinical instructions. Stop and seek medical help for swelling, pain, leaking, fever, breathing difficulty, or unusual redness. A tidy setup may still be unsafe if emergency access is blocked. Recheck the arrangement after the first supervised use.
Tools, Materials, and Wall Requirements for Secure Installation
Installing a wall-mounted IV stand at home requires more than a drill and a few screws. Prepare a stud finder, spirit level, pencil, measuring tape, drill, suitable bits, screwdriver, and protective eyewear. Use corrosion-resistant screws and anchors rated for the wall type. The mounting plate should match the stand’s hole pattern and stated load capacity.
Wall construction matters. A solid timber stud or masonry surface usually provides better support than hollow drywall. If drywall is unavoidable, locate a stud whenever possible. Otherwise, use heavy-duty cavity anchors approved for the expected load. Do not rely on ordinary plastic plugs. Check the wall for hidden electrical cables and plumbing before drilling. Keep the stand away from damp areas, heaters, doors, and narrow walkways.
Mark the mounting height while considering the patient’s bed or chair. The hook should hang freely without touching furniture. Hold the plate against the wall, confirm it is level, then drill clean, correctly sized holes. Tighten each fastener evenly and check for movement. I would test the empty stand first, then apply a controlled load below its rated capacity. That extra check is easy to skip.
Do not use the stand to support a person, pump, or heavy equipment unless the manufacturer’s instructions allow it. A qualified healthcare or installation professional should inspect the setup before clinical use. My first wall measurement might look accurate, but bed height and tubing reach can still prove inconvenient. Recheck both before drilling.
How to Install a Wall Mounted IV Stand at Home?
A secure installation depends on the wall structure, suitable anchors, and at least two independent fixing points. The chart shows a conservative planning baseline for common residential wall types; always verify the stand’s rated load and the anchor manufacturer’s specifications.
Tools and Materials
Prepare a stud finder, tape measure, pencil, level, drill, correct drill bit, screwdriver or socket driver, appropriate wall anchors, mounting screws, washers, and personal protective equipment. Wood studs and masonry require different fasteners; drywall alone should not carry a wall-mounted IV stand unless a properly secured backing structure is present.
Wall Requirements
Locate solid framing or sound masonry before drilling. Keep the mounting plate level, avoid damaged or hollow areas, and confirm that pipes and electrical cables are not behind the drilling points. Test the completed installation for movement before attaching clinical equipment.
How to Choose the Correct Mounting Location and Height
Choosing the correct location is more important than making the wall look tidy.
Home IV therapy should follow a clinician’s written instructions and use a secure, professionally installed mount. Select a dry, well-lit wall near the treatment chair or bed. Keep it away from sinks, cooking areas, heaters, windows, and busy doorways. Check for hidden pipes and electrical cables before drilling. The wall must support the mount, the fluid container, and any attached equipment.
Height needs careful adjustment.
The fluid container should remain above the catheter site when gravity flow is used, but the exact distance depends on the prescribed equipment. A qualified nurse should confirm this position.
For pump-assisted therapy, the pump instructions may allow a different arrangement. The container should stay visible and easy to reach, with enough clearance for changing bags. Tubing should hang smoothly without sharp bends, pressure points, or contact with the floor.
Test the setup while seated in the actual treatment position.
Can you read the label? Can you reach the clamp without stretching? Is the tubing protected from pets, children, wheels, and chair arms?
A height that looks correct in an empty room may feel awkward during treatment. I would rather adjust the mount twice than accept a risky compromise.
Do not begin an infusion if the mount feels loose, the wall cracks, or the tubing pulls when you move.
Ask the visiting nurse or installer to inspect the finished position.
Step-by-Step Guide to Attaching the IV Stand to the Wall
Before installing a wall-mounted IV stand, ask a qualified healthcare professional or technician to inspect the location. The wall must support the stand, equipment, and fluid bag without movement. Choose a spot beside the bed or treatment chair, with clear floor space and easy access to the patient. Avoid areas near electrical cables, plumbing, windows, or doors. A wall stud or solid masonry surface is safer than unsupported drywall.
Hold the mounting plate against the wall and mark each hole with a pencil. Check that the plate sits level. Drill only with the correct bit and depth for the wall material. Use screws and anchors rated for the expected load. I would not trust ordinary plastic anchors for a loaded IV stand. Tighten the screws evenly, then attach the vertical pole and locking components. Recheck every connection by hand.
Apply gentle downward and sideways pressure before placing any medical equipment. The stand should remain firm, without creaking, tilting, or pulling away from the wall. A technician should verify the final load rating. Do not connect an IV line or begin treatment during installation. Tubing can catch on nearby furniture, and that risk is easy to underestimate. I once noticed that a perfectly level mount still felt unstable because one screw had entered weak material. That small detail deserves another inspection. Keep the area dry, visible, and free from children or pets.
Final Stability Checks and Safe IV Bag Placement
After installing a wall-mounted IV stand, perform a careful stability check before any clinical use.
A qualified healthcare professional should approve the location and installation. Inspect every screw, anchor, bracket, and connection for movement. Press the stand gently from several directions. It should remain firm without creaking, shifting, or separating from the wall. Check the wall surface for cracks, moisture, or damaged plaster. A level appearance alone does not prove reliable support.
Place the IV bag on the designated hook, with the container upright and fully supported.
Do not exceed the stand’s stated weight limit. Keep the bag away from doors, heaters, windows, children, and pets. The tubing should hang freely without sharp bends, knots, or contact with the floor. Leave enough clearance for the person receiving care to move safely. The drip chamber and tubing should remain visible for regular observation.
It is easy to focus on neat installation and miss small hazards.
A loose cable, crowded hook, or slightly tilted bag deserves another inspection. Never improvise extra hooks or hang multiple bags unless the equipment is specifically designed for them. Only trained medical personnel should connect the system, adjust flow, or respond to alarms and complications. If the wall feels soft or the stand shifts even slightly, stop using it and request a professional assessment.
Stability should feel boring. That is the point.
Conclusion
Installing a wall-mounted IV stand at home requires careful planning, appropriate equipment, and attention to patient safety. Before beginning, confirm that home use is medically authorized and that a qualified healthcare professional has explained the IV procedure. The wall must be strong, stable, and free from hidden electrical cables or plumbing. Gather a suitable wall-mount bracket, compatible fasteners, a level, measuring tools, and basic hand tools. Select a location that is easy to access, well lit, and positioned at a safe height for the prescribed infusion setup.
To understand how to install a wall-mounted IV drip stand at home, mark the mounting points carefully and attach the bracket according to its instructions, ensuring every screw is firmly secured in an appropriate wall support. Check that the stand remains level and does not shift, tilt, or loosen under gentle pressure. Before placing an IV bag, verify that the hook and bracket can safely support its weight, keep tubing free from bends or trip hazards, and complete a final stability check. Stop immediately if anything appears unstable and seek professional assistance.

 Zenith Medical