How to measure a doorway for wheelchair accessibility? Start with the opening a wheelchair can actually pass through, not the width of the door or frame. A doorway may look broad, yet the open door can leave a narrow passage. Small details matter.
Open the door to 90 degrees, then measure the clear space between the door face and the opposite stop. Keep the tape level, and note the narrowest point. Also check the threshold, nearby handles, and space to turn or approach the doorway. A single width measurement cannot describe every user’s needs, so record obstacles and approach conditions too. That is easy to miss.
Architect Ron Mace, a pioneer of universal design, described the goal this way: “Universal design is the design of products and environments to be usable by all people, to the greatest extent possible, without the need for adaptation or specialized design.” His principle is useful here: measure for real use, not appearance. The required clear width can depend on applicable accessibility standards, the building, and the wheelchair being used. Verify current local guidance before making changes. If a measurement sits close to a required limit, recheck it; tape placement and door position can shift the result. This guide explains how to measure a doorway for wheelchair accessibility with practical steps, while recognizing that one number may not capture the whole experience. A careful measurement helps, but it is not the whole story.
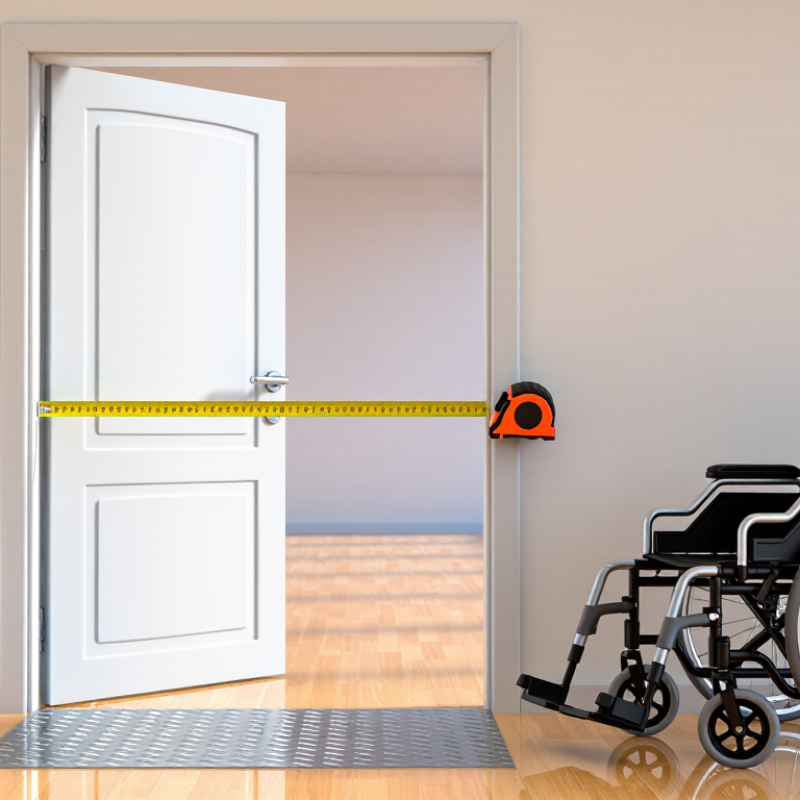
To identify a doorway’s clear opening, open the door to 90 degrees if it can swing that far. Measure from the face of the open door to the opposite door stop, not from one side of the frame to the other. That frame measurement can look generous while the usable passage is narrower. Keep the tape level and straight across the opening. Check the tightest point, including any part of the door or hardware that projects into the path.
Measure at more than one height, especially if the door or frame is uneven. A handle, hinge, or thick door edge may reduce the space a wheelchair can pass through. That gap matters. If the door stops short of 90 degrees, record the opening at its actual resting position and note how far it opens. I once assumed a doorway was wide enough because the tape showed a broad frame; the door itself took away useful space. Recheck the measurement, and write down the door position and measuring points so someone else can repeat it. Clear-opening needs vary with the wheelchair and the approach, so compare your result with current accessibility guidance or ask a qualified access specialist.
Before measuring, gather a sturdy tape measure, pencil, and paper or a clipboard. A phone can help you record photos, but do not rely on pictures for exact dimensions. Check that the tape’s markings are easy to read. A small level is useful for spotting a tilted frame, though it is not essential.
Clear the approach on both sides of the doorway. Move shoes, mats, bins, and loose cables out of the way. Open the door fully and check whether its handle or hinges limit access. Keep the route well lit. If the floor is uneven, note it rather than trying to estimate around it. Small details matter.
I like to write down the room and doorway location before taking measurements. It sounds obvious, but notes can blur together when several doors look alike. Keep the tape straight and have someone steady the other end if needed. Don’t pull it across a sharp edge. If you are measuring alone, take your time. A second reading can catch a small slip. I sometimes forget to note where the measurement began, so I mark that on the page too.
Bring a tape measure, a level, and a notepad. Move nearby obstacles, then open the door to 90 degrees before measuring the clear opening between the door face and the frame stop.
U.S. ADA reference measurements: a door opening must provide at least 32 inches of clear width. Changes in level are limited to ¼ inch vertically; changes from ¼ to ½ inch must be beveled. Door thresholds may be up to ½ inch high. These are separate checks, not interchangeable dimensions. Check applicable local requirements.
Open the door to 90 degrees and measure the clear space between the door’s face and the opposite stop. Do not measure across the outer trim; that can make the opening seem wider than it is. Take readings near the floor, around 30 inches high, and higher up. Keep the tape level each time. A bowed frame, thick trim, or projecting hardware can reduce space at one point. The narrowest reading deserves attention.
Check carefully. A small difference matters. Record each measurement in inches or centimeters, and note where you took it. For example, a doorway might measure 33 inches near the top but only 31 inches beside a bulky latch. Also check whether the door swings fully open and stays there; a door that drifts back can obstruct the route. I’ve found it easy to trust a single measurement, then notice a handle or uneven frame later. That is worth a second look. Accessibility requirements vary by location, so compare your measurements with the relevant local guidance before deciding whether the opening is suitable.
When measuring a doorway, inspect the threshold and the space leading to it—not just the opening. A tape measure can reveal the height, but a slow approach also shows whether a mat curls or a floor transition catches a front caster. Small details matter. The U.S. Access Board’s 2010 ADA Standards limit thresholds in accessible routes to ½ inch, with specific beveling requirements for changes above ¼ inch. A smooth-looking strip may still feel abrupt when approached in a wheelchair, so check it from both directions.
Next, measure the approach area with the door open and closed. Note furniture, radiators, hallway turns, and whether someone can reach the handle without blocking their wheels. The ADA Standards’ door maneuvering-clearance requirements vary by approach direction and whether the person pushes or pulls. A 30-by-48-inch clear floor space is a useful reference for wheelchair positioning under Section 305, but it does not replace the door-specific clearances in Section 404. Measure the actual layout.
Record the tightest usable space, not the room’s best-looking stretch. A rug that shifts under a wheel can change an otherwise workable approach. I would not assume a small lip is harmless. If measurements are close to the standard, check the applicable clearance diagrams or ask an accessibility professional to assess the route in person. ADA references: 2010 Standards for Accessible Design, Sections 303, 305, and 404.
Compare the clear opening, not just the door slab. In the United States, the ADA Standards generally require at least 32 inches of clear width when a hinged door is open 90 degrees. Measure from the door’s face to the opposite stop. A tape measure across the closed door gives a different, less useful number. Check the standard that applies to your location and building; requirements can vary.
Width is only one part of the comparison. Note the doorway depth, threshold height, door swing, and space beside the handle. These details affect whether a wheelchair user can approach, reach the hardware, and pass through without awkward repositioning.
For example, a thick frame or a door that opens only partway can reduce usable clearance. A small raised threshold may also catch a front caster. Check the relevant accessibility guidance for maneuvering clearances, since these depend on approach direction and door type.
Measure with the door fully open, then compare each result with the applicable requirements. Write down the numbers. It helps. If possible, observe the route with a wheelchair user’s permission, without treating one person’s experience as universal. A doorway can meet a width target and still feel difficult to use. That difference deserves a closer look, not a guess.
Open the door to 90 degrees, if possible. Measure from the door’s face to the opposite stop, keeping the tape level. The frame width can be misleading.
Measure at its actual resting position and note how far it opens. Record the measuring points so someone else can repeat the check. Recheck it.
Yes. An uneven frame, thick door edge, handle, or hinge may reduce usable space. Check the tightest point along the passage.
For many hinged doors opened to 90 degrees, the general minimum is 32 inches of clear width. Check requirements for the specific building and location.
A raised strip or curled mat can catch a front caster. Check the threshold from both directions and look for rugs, furniture, or tight turns.
U.S. standards limit thresholds on accessible routes to ½ inch, with beveling requirements for changes above ¼ inch. A small lip may still feel abrupt.
It can help with wheelchair positioning, but it does not replace door-specific maneuvering clearances. Those vary by approach direction and whether the door is pushed or pulled.
Yes. The swing, handle position, threshold, and approach space also matter. Measurements are useful, but they do not capture every person’s experience. A closer look may be needed.
How to measure a doorway for wheelchair accessibility? Start by identifying the clear opening: the usable space between the door and its frame when the door is fully open. Gather a tape measure, clear away nearby objects, and make sure the door can open as far as it normally would. Measure the clear width at several heights, since trim, hardware, or an uneven frame may reduce the usable space at one point. Record the narrowest measurement rather than relying on a single reading.
Also check the threshold for raised edges or abrupt changes in height, and look at the space on both sides of the doorway to ensure there is room to approach and maneuver. Compare your measurements with the accessibility requirements that apply to your location and situation. If the opening or approach seems too restricted, consider getting qualified guidance before making changes.
Zenith Medical